N THIS NEW TUTORIAL, WE WILL SEE THE CREATION OF FACES IN A FIRST STEP.
You can find the main part of this tutorial in this video from our youtube channel:
To begin, we will put ourselves in top view by putting ourselves in parallel projection in order to see well in 2D. I refer you to this previous tutorial to see how to do it: SketchUp tutorial | drawing tools: line, rectangle, dimensions input.
To create faces, we will take our “line” tool and we will make our lines by making simple clicks (we don’t stay pressed on our mouse button). As we saw earlier, the tool will automatically start a new line where we finished our previous line. All this until we close our polygon.
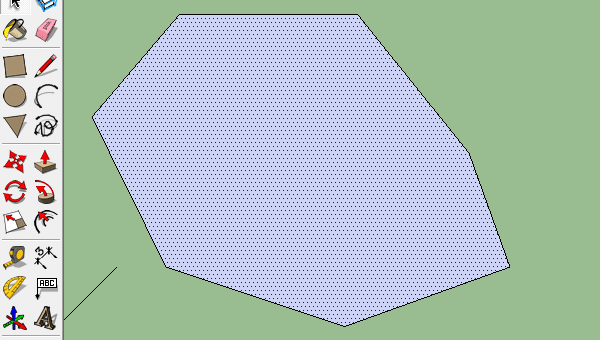
I invite you to make any shape with your “line” tool. You’ll notice that when you made any shape you sometimes had your line tool “lock up”, displaying different colors: green, blue, red or purple. This is the inference I will explain later in this tutorial. By closing your polygon you have just created a face. By taking the “selection” tool you can select this face, and you will see that by doing this you do not select the lines that made this one.
You can delete this face by pressing the “delete” key on your keyboard, and since the selection will only affect it, the segments will still be there. You can recreate the face quite easily, just make a line over another one. Don’t worry, you won’t have two lines in the same place. SketchUp is designed to understand what you want to do, and in this case, it will understand that you want to make a face. On the contrary, when you open your polygon, by deleting one of the segments for example, the face will not remain. Every time you close polygons, SketchUp will make faces for you. If it doesn’t, chances are your segments are not coplanar.
Of course, you will have noticed that when you use the rectangle, circle or polygon tools, the faces are made automatically.
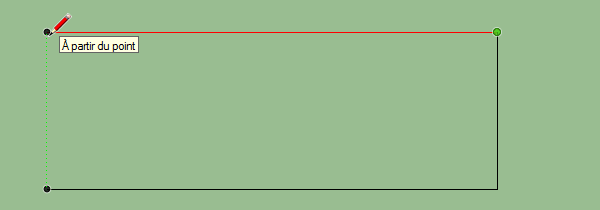
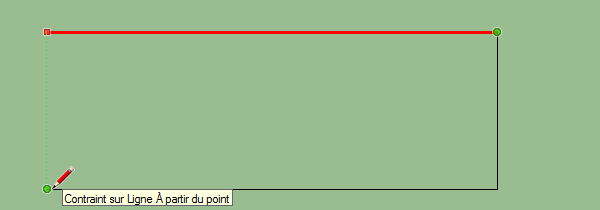
Let’s get back to inferences. These inferences are one of the strengths of SketchUp. We’ll make a rectangle with the “line” tool to see how they work. To begin, we’re going to make a simple rectangle. To do this, we’re going to take our “line” tool, do a single click and we’re going to go to our right. If you stay more or less parallel to the red axis your line will take on the color red and be “magnetized” to that axis. This is called an inference. If you go too far off this axis, SketchUp will understand that you don’t want a parallel line and will stop “blocking” your line on the axis. Make your line on your right side parallel to the red axis. Once you click to finish your line, a new one starts, we will go up and this time the inference will be on the green axis. Click to finish your line. Then we’re going to go back to the left and we’re going to try to get above the first point. As we do this, you’ll see that SketchUp will understand that you want to put your point on top of the other one and it will make a dotted line to show you that these points will be at the same distance.
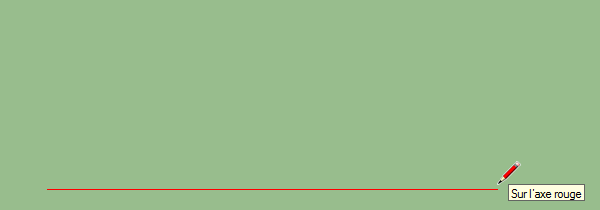
t is possible to force the inference along an axis which allows us to make our line only in this axis. So we can put our cursor where we want, while keeping our line on our axis. In our example, we can go to the left, the line becomes red and we press the “shift” key on our keyboard and then we put our cursor on the first point of the rectangle.
You can see that our red line thickens to show that it is forced.
Now all we have to do is close our rectangle.
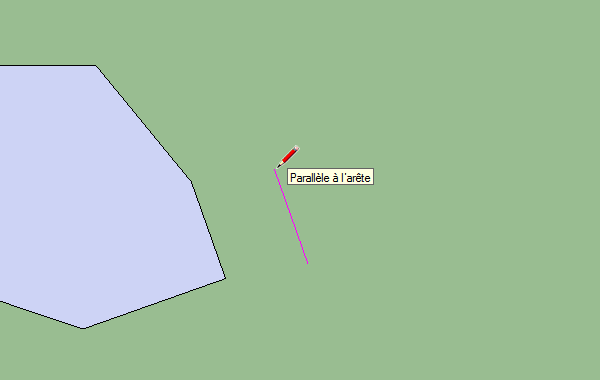
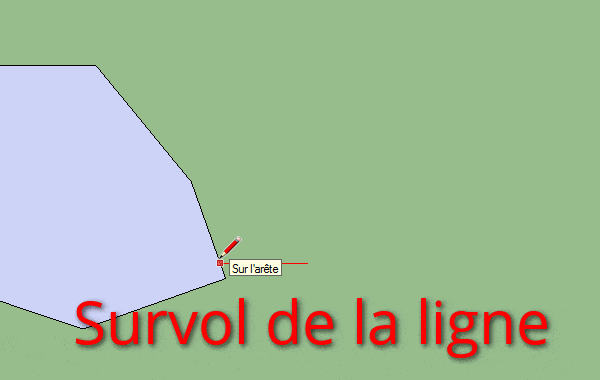
Of course we could have made this rectangle with the rectangle tool, but we will see how to make inferences along other axes than the basic ones. Indeed, we can draw parallel and perpendicular lines with respect to any line. To do this we will take our polygon and draw a line parallel to one of the segments of our polygon. Let’s start our line next to our polygon, then we’ll fly over the line we want to make a parallel to. Then we return to our point and go in the direction of the parallel. You’ll see that just like the green or red axis, we’ll have our line change color to purple and we’ll have the text “parallel to the edge” appear.
Finish your line, then make a perpendicular to that line. You’ll see that there will be a new purple inference that appears, this time to say that it’s perfectly perpendicular. Once this second line is done, we’ll start our third line by being perpendicular again, and this time we’ll press our “shift” key to force the inference. We’ll place our mouse cursor on the first point of our rectangle. This way, we have our third edge that will be the same length as our first edge. Now we just have to close our rectangle.
With the inferences and the line tool we can make rectangles that are not locked on the green and red axes. Of course, inferences can be used with other tools than the line tool. You can also use it with the “move” tool for example, a tool that we will quickly see in the next tutorial: SketchUp tutorial | adherence of 2 dimensional geometries