SketchUp offers many possibilities for 3D modeling to all its users, no matter what model they are modeling. A contextual tool adapted to each situation that can be used with just a left click in the taskbar. Adebeo has many tutorials to teach beginners and designers how to use the software. In this tutorial we will discover the components window, one of the most important SketchUp windows. This tutorial will also allow us to better understand the use of the 3D image bank via the “components” window.
Component Window Tutorial
To understand the use of our “components” window, we will create two components, which we will name cube and cylinder. Then go to the “windows” menu and choose “components”. After that, the components window will appear. Click on the little house in the window next to the “Google” search field. This little house indicates that we will see all the components that are in our file. When we delete a component in our 3D view, the component is not deleted from the file. It will therefore be in this window. This window does not contain the groups, only the components.
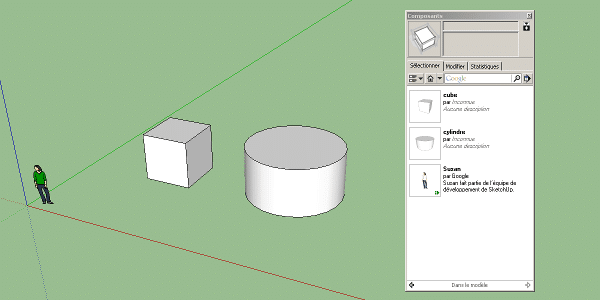
We can notice that the woman in 2D is also a component. Thanks to this window, we can make copies of our components very easily. Just click with the cursor on the desired component. SketchUp will automatically display the “move” tool with our component at the end. We can then place it by dragging the pointer and clicking where we want to put it. The point that will be taken to place the component will be the point of origin of the component when it was created. It is not necessary to rotate and drag it on the central axis. That’s it, the first step of the tutorial is done, we will now approach the management of this component window.
SketchUp Window tutorial part 2
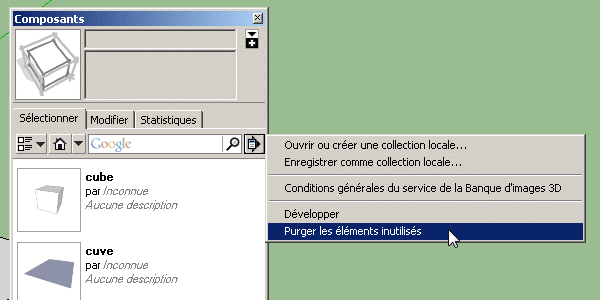
In this window we will find all the components we have created in our template, even if they have been deleted in the template. Do you want to remove the components from your window to delete them permanently this time? Drag the cursor and right click on the component (in the window). Then click on “delete” with the mouse button. A window may appear saying “Attention all copies will be deleted”. This means that there is still a copy of this component in your model. You can also remove components from your file that are not somewhere in your 3D view. To do this you can press the “details” arrow in the window and choose the “purge unused elements” option.
If you want to change the properties of the component as when it was created, this window will also be used. To do this, right click on the component (in the window) and click on “Properties”. The “modify” tab will be selected: you will be able to choose your options as when you created your component.
So, we have seen the basics of this SketchUp “components” window which already allows us to do many things. We will see in our next tutorial how to use the 3D image bank.
Other SketchUp tutorials
We have not yet discussed some tools, such as the tag (layer) implemented by the developers. However, the main attribute of the three-dimensional modeling software SketchUp Pro version remains its plugins. With them, you get easier importing and exporting, shorter rendering times that allow more realistic models… That’s not all! Tools allow you to edit the selected digital models to the maximum. There are also many tutorials to learn how to make elements appear and copy components, juggle layers and resize models and the selected element… Learn how to navigate in the 3D architecture software SketchUp with keyboard shortcuts. They will work wonders on your selected objects with a simple double-click. Tutorials exist for all the possibilities! Prevent a bug, rename models, select a file, open it and copy-paste it elsewhere, create shortcuts yourself…
The possibilities and mastery of SketchUp
SketchUp still hides many possibilities. For example, you can learn how to export and import skp files. This way you can create 2D and 3D models on multiple licenses and save time in transferring them. The toolbar, user interface and keyboard shortcuts also hide many secrets. Indeed, you have a lot to learn on both Mac and Windows about tool icons and the Cad. Enable select and disable components, change the control panel and default design tools… Learn how to master the pencil, eraser, meter drawing tools with our other tutorials. This is your chance to create the best technical drawings and optimize your designs with the best 3D architecture software! Drafters, designers, architects, computer graphic artists, SketchUp Pro is the tool of your dreams.