In this tutorial, we will discuss the operation of 2 basic drawing tools: the “line” tool and the “rectangle” tool. We will also see how to enter dimensions and dimensions, to draw lines and rectangles of the exact size you want. You will find the essence of this drawing tutorial in these two videos on our youtube channel:
Perspective and parallel projection
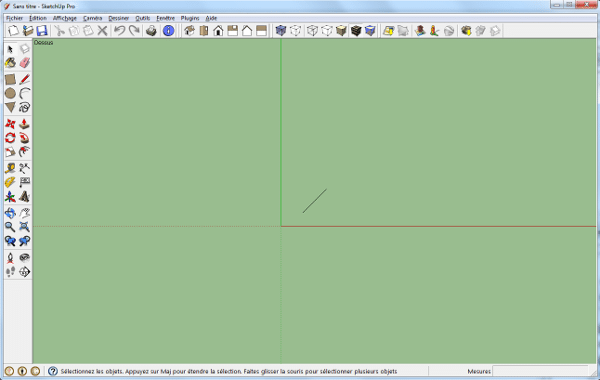
To do our tests and projects, we will configure the modeling software SketchUp to work in top view without perspective. To do this, simply click on the icon of the roof of the house in the “views” toolbar with the mouse (if you do not have this toolbar visible, to display it on the screen, go to the “view” menu, then “toolbar”, then check “views”).
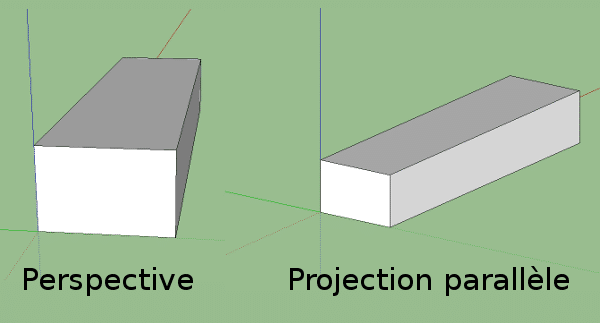
 We are going to use the “parallel projection” view to work more easily in 2D drawing. To understand the difference between this view and perspective, here is the effect on a parallelepiped:
The perspective mode in the view tool
This is the view that simulates reality with leakage points while the parallel projection allows to keep the parallels. This last view is very useful when working on architecture to work at scale and to keep the dimensions.
THE PARALLEL PROJECTION FUNCTION
The view is accessible from the “camera” menu. When you want to model in 3D again, you will return to the perspective view. This mode is more natural when doing volume, and therefore easier to understand.
If you have followed the steps so far, you should have a view like this:
On your layer, you notice a black line. This line is Suzanne, the person you see when you open SketchUp. As this person is in 2D, well, we can see her flat from above! Also, if you move around in a panoramic view, you will always see this feature. On the other hand, if you have not yet activated the “parallel projection” mode, Suzanne takes shape… You can also try to change the view mode to see the difference when you pan.
Training in Sketchup modify dimensions
Now that we have seen the difference between “parallel projection” and “perspective”, we can start to discover the drawing tools of the technical drawing software Sketchup.
 So we have the “rectangle” tool, the “line” tool, the “circle” tool, the “arc” tool, the “polygon” tool and the “freehand” tool. As I said at the beginning of the post, we will look at the “line” tool and the “rectangle” tool.
Draw a line in Sketchup

Let’s start with the line tool. Use the left mouse button to click on the tool button directly, or discover the shortcut “L key” for “Line”. This tool can be used in two different ways depending on how you click it. The first way is to hold down the mouse button while drawing the line. In this way we create a simple line.
However, in the SketchUp design software, we use a second way instead, consisting of a simple click. We then release the button and draw our line. To finalize it, we click again. You will see that by doing this, we have started a second line that begins where the first one ends. As long as the polygon is not closed, we will start a new line using this method. If you don’t want to start another line for some reason, you can press the “escape” or “esc” key on your keyboard at any time.
When you tried this tool, you may have noticed that at times the tool tended to “lock” on one axis or another by turning red, green or even purple. This is called inference. It is in fact a guide to help the user in this action in an intuitive way. This is really one of the strengths of the software. For a detailed look at how inference works in SketchUp, you can check out our associated youtube tutorial. Now, maybe you are wondering “how can I get a line exactly 2m long?”.
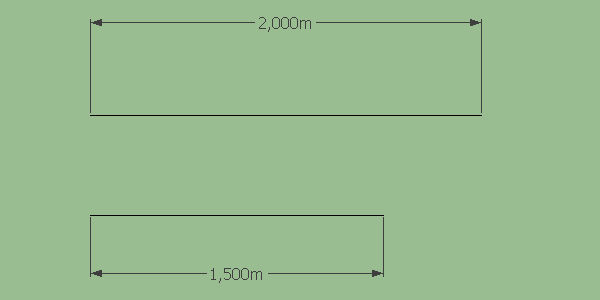
At the bottom right of SketchUp, we have an active window indicating the length of what we are doing. To enter an exact length value into SketchUp, again we have two ways to do this: enter the length before or after you make your line. When I say before, I mean of course before you click to finish your line, not before you start it of course! When you start your line, give the direction of the line, and then you can simply type the length of the line on your keyboard. In the case of 2m, simply type “2m” and then press the “enter” key to validate the value. To put “1.5m”, you must put a comma and not a point to take into account the decimal. If you get an error message when entering your dimensions, the comma may be the reason. You can change this size at any time by entering a new value as long as you have not started another action (making another line, or changing tool for example). Of course, giving dimensions is not limited to meters only. You can enter “40cm” or even millimeters “20mm”. How precise you can be in SketchUp depends on your preferences.
To configure these preferences, go to the “window” menu and then to “model info”. You should have this window displayed:
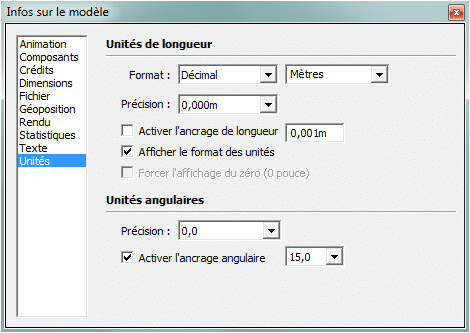
This window only affects your open file. This one allows you to select the default unit used. This means that without a specific unit of measurement in SketchUp, it will put the measurement in meters. If you are using mostly centimeters, it would be wise to change the default unit and select “Centimeters” from the drop-down list. So when you type “20” in dimension, it will put “20cm” directly. The precision indicates the number of digits you can use after the decimal point.
Drawing a rectangle in Sketchup pro

Now we’ll turn to the “rectangle” tool. Click on it, or press the keyboard shortcut key “R”. The rectangle tool is easy to use. Again, you can make your rectangle in two ways with your mouse cursor. The first is to click, hold down the mouse button, and draw your rectangle. Once the rectangle is made, you can release your button. The second method, which I strongly encourage you to use, is to do a single click, move the mouse to where you want to make your rectangle, and do a single click again. Unlike the “line” tool, this does not start another rectangle by doing this.
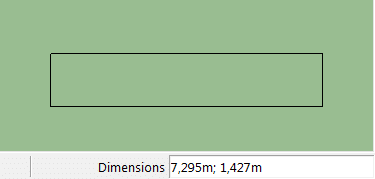
You can also specify a size in the same way as for your line and resize as needed. However, since you have two variables to fill in, you will need to separate them with a semicolon “;”. For example, if I want a rectangle of 10m x 20m, I type “10m;20m” or “10;20” if I have the default unit meter. To know the orientation of the rectangle, the easiest way is to look at the measurements when we draw our rectangle. To the right, to the left, position it and resize it as you like.
We’ve seen the Line tool, the Rectangle tool and how to enter dimensions; you can export your design. More geometry? Check out our tutorial on the circle and polygon drawing tools.